Best Way to Print Digital Scrapbook Paper
Create a digital paper sculpture in 16 simple steps
In this tutorial, we'll take a close look at how to plan and gather imagery for use in an abstract manipulation. I find that this design process is playful by nature and generally encourages a large degree of experimentation as you go along.
It's always interesting to see what can be created from limited resources. In this particular case, we're talking about some blank sheets of coloured paper. This is when things start to become abstracted and geometric shapes are everything. I'll show you how to transform your boring sheets of paper for the better, and how to effectively bring them into the digital realm.
The inspiration for this paper-infused design style comes from a range of work, including origami, physical paper sculptures and mixed-media installations.
01. Sketch geometric shapes
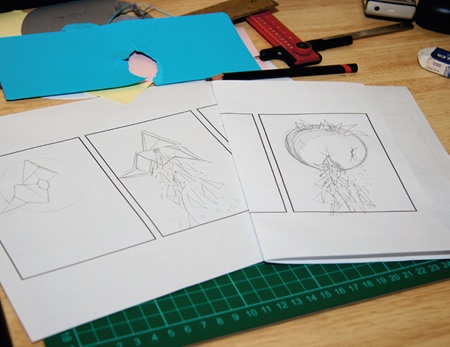
To give yourself a bit of direction, start by sketching out some different geometric designs on paper. I tend to use my sketches loosely, letting my designs evolve as I go along. In this case, I decide to incorporate elements from all of my initial sketches, including the stream effect seen here.
02. Coloured card
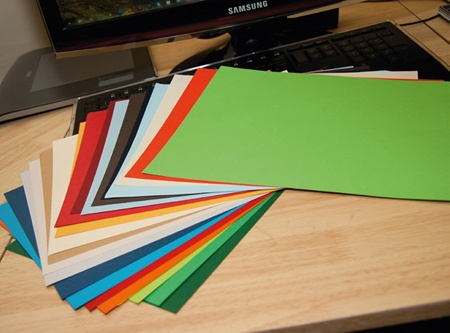
Once you're ready to move on, source a selection of coloured card or paper. You can either carefully choose colours from your favourite art supplier, or find a cheap pack from your local stationers. The first option is preferable, but both are suitable. You can always alter the colours in Photoshop if they aren't quite coherent.
03. Geometric forms
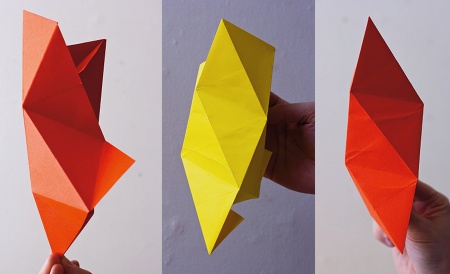
Once you've obtained some paper, the next step is to create a small selection of geometric forms. For this part, you don't need to use any glue: all you need to do is fold. These forms don't need to be seamless; they just need to look interesting. Find a suitable background and then photograph your creations from different angles.
04. Sonobe units
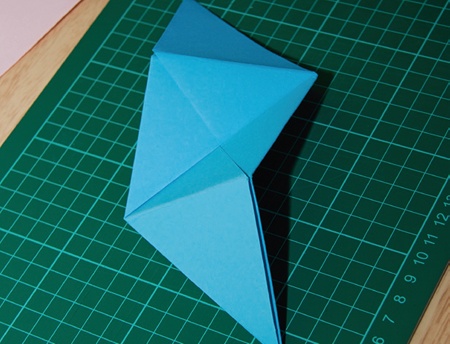
For this next step, you may need to do a little research. Cut out several square pieces of a paper and fold them into Sonobe units. These fun little origami modules can be linked together to form much larger shapes and forms.
05. Photograph form
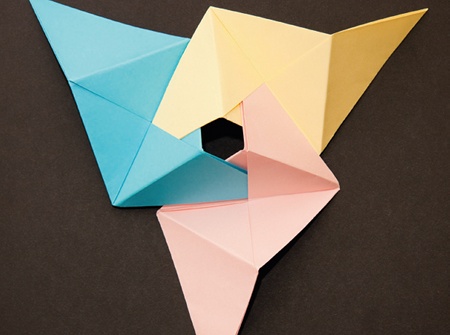
Once your units are ready, link them together in whichever way you prefer. I decide to go with a triangular configuration, making sure that I leave a gap for where the paper stream will gush outward. Before moving on to the next step, take a photograph of the form on a high-contrast background.
06. Hole punch
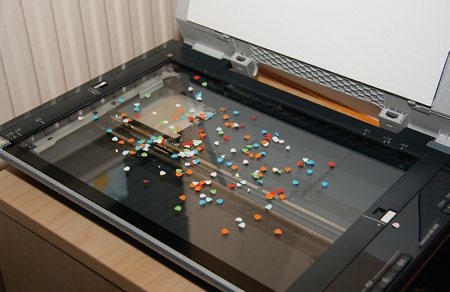
Gather several coloured sheets of paper and attack them with a hole puncher. Empty the discs onto your scanner and arrange them as you see fit. Place a high-contrast piece of card on top and scan at 300dpi or higher.
07. Photoshop colour space
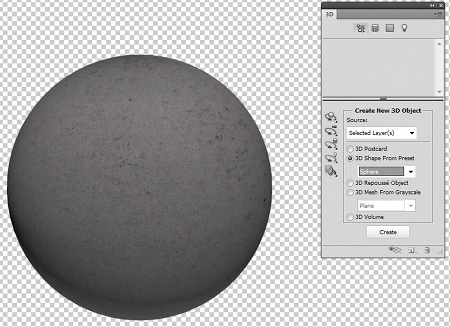
Open Photoshop and create a 300dpi document in an RGB colour space. Now import a high-res texture, select the layer and bring up the 3D panel. Make sure the source is on Selected Layers, then choose Sphere from the drop-down menu and click Create. You now have a perfectly rendered and textured sphere, which will provide a nice contrast to the sharp, angular elements. Create a new document in the CMYK colour space, measuring 222mm by 300mm, then drag your sphere over.
08. Import photos
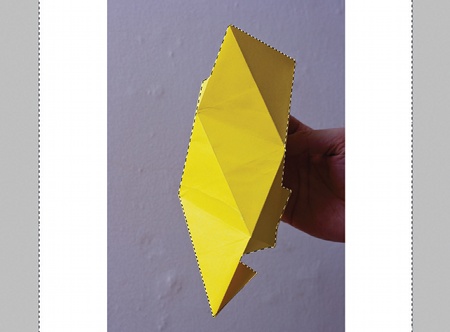
Now it's time to import all of your photos. You need to spend some time cutting out each element, but since they're fairly simple geometric shapes, you can save some time and use the Polygon Lasso tool (L). When you've made a selection around the object, hit Ctrl/Cmd+I to invert the selection, then press Backspace to delete the background. If you find there's a slight halo around the object, use the Defringe tool (Layer>Matting>Defringe) and select 1 or 2 pixels.
09. Colour overlay diversity
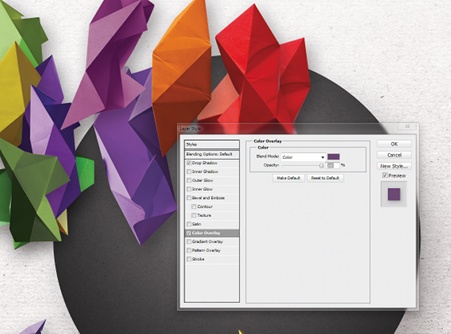
Once you've cut everything out, you can start dragging things into your main project file. If you find that there isn't enough colour diversity among your paper forms, you can easily solve this within Photoshop. With your layer selected, choose the Colour Overlay option found under the Styles menus in the Layers palette. Pick a shade and set the blending mode to Colour. You might also need to experiment with the levels a little to get the best results (Ctrl/Cmd+L).
10. Linear burn Sonobe creation
Import your Sonobe creation and cut it out as before. Position it over the sphere and create two copies. Select these two new layers and press Ctrl/Cmd+G to group them. Use Free Transform to scale them down and then rotate the second copy about 45 degrees. Set the blending mode to Linear Burn on both layers, then select the group folder and change the blending mode to Normal. This prevents the grouped objects from blending with external layers. Create a layer mask for the group and erase the overlapping areas in the centre to fully reveal the gap.
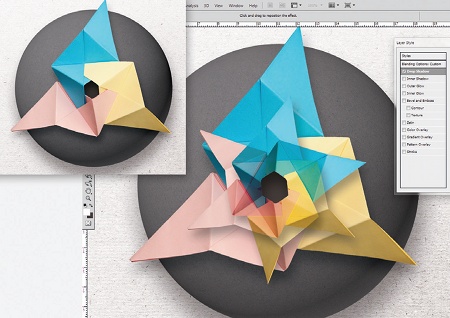
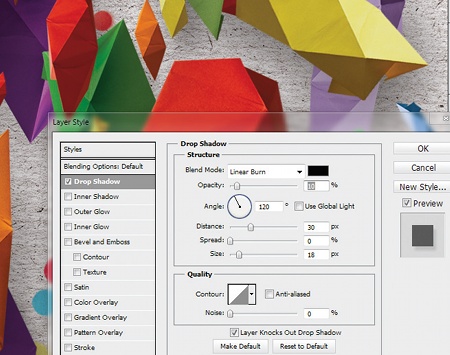
11. Pologonal shapes
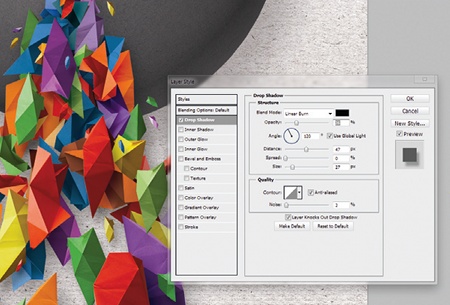
Now it's time to get creative with those polygonal shaped elements. Keep duplicating the layers, and slowly build up a nice varied flow stemming from the centre of the sphere. Mix up the colours and the sizes to keep the composition interesting. To give things more consistency and depth, apply drop shadows to every element.
12. Magic wand punched discs
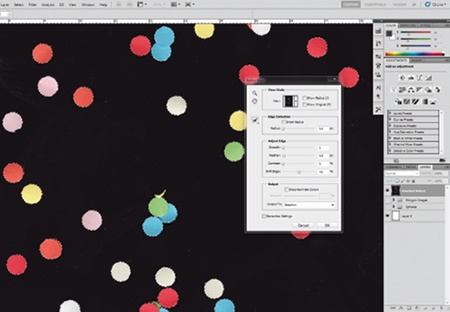
Open up the scan featuring the punched discs. Select the Magic Wand tool (W) and make sure Contiguous is un-ticked. Click anywhere in the dark area, then go to Refine Edge. From here you can make precise adjustments to the selection and experiment until you get the desired result. Once you're happy with the selection, click OK and then press Backspace to delete the background.
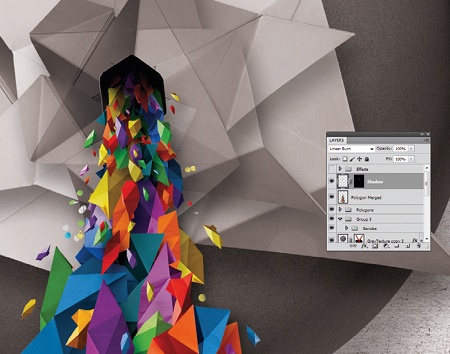
13. Integrate paper stream
Drag the image into your project and integrate it into the paper stream. The aim here is to pepper the composition slightly, trying not to overuse it. Again, remember to apply a drop shadow.
14. Desaturate
At this point I decide to de-saturate the Sonobe element with a Hue/Saturation layer. I feel that the colours interfere slightly with those in the paper stream. Now that the main objects are in position, you need to finish building the paper stream up to the centre gap. Once completed, create a new layer and change the blending mode to Linear Burn. Paint a shadow at the back of the stream using a soft, low-opacity brush. Create a layer mask and erase any unwanted parts of the shadow.
15. Illuminate
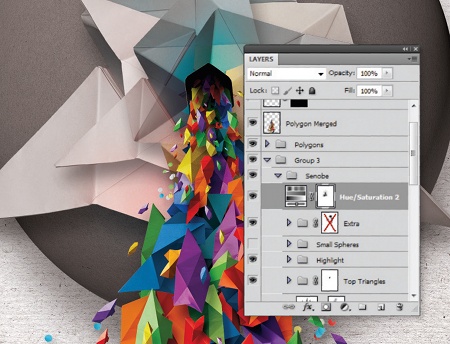
Add a layer mask to the Hue/Saturation layer mentioned in the previous step. Select a black brush with a low opacity and lightly paint around the gap in the centre of the Sonobe element. This will enable some of the original colour to show through, creating a slight illumination.
16. Adjustment layers balance
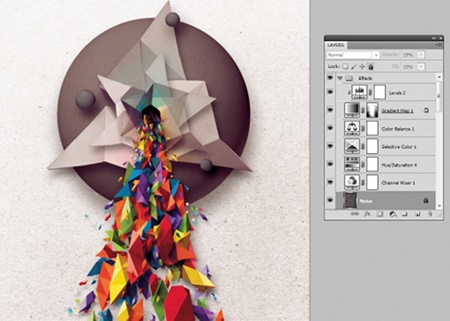
To finish things off, I always like to add a bunch of adjustment layers. These help achieve many different things, but most importantly they can bring the piece together. Add a black and white gradient map, set the blending mode to Overlay and lower Opacity/Fill to around 50%. You can then add a Colour Balance layer to tweak the tones slightly, or even a Selective Colour layer to alter things further. I also increase the saturation slightly to give the design a bit more punch.
Words: Richard Nabarro
Richard Nabarro is a freelance designer and illustrator.
Related articles
Best Way to Print Digital Scrapbook Paper
Source: https://www.creativebloq.com/graphic-design/create-digital-paper-sculpture-4118665
0 Response to "Best Way to Print Digital Scrapbook Paper"
Post a Comment