A Origami Bird Using a Hole Peace of Paper
When I was in 4th grade, I got a chance to fly across the continental United States. The only reason I didn't go out of my mind with boredom during that nearly 6 hour flight was that my aunt taught me how to make this origami flapping bird on the plane. I probably made nearly 100 birds during that flight. Even now, decades later, I still remember exactly how to do it due to aunt's careful instruction.

If you subscribe to my newsletter, you might recall that I am currently in the process of teaching math to a group of kids between the ages of 9 and 14 at our local homeschool co-op. During one of the classes, we worked on YouCubed's paper folding task. We had a little time at the end of class, so I decided to show my crew how to make this bird.
The experience taught me why a plane trip is a good time for learning this skill. Trying to cram all that information into 10 minutes with 15 kids really did not work that well at all. They were so enthusiastic about our detour into origami, but we only made it about two thirds of the way through the steps before they had to go home. I felt so bad about disappointing the students, that I went home and made a handout to give them at our next class.
Recommended Age Range: Elementary, Middle School, High School (honestly, who doesn't love origami?)
Time Required: ~15 minutes (once you are familiar with the steps, it only takes about a minute to make)
Difficulty: Medium (there is one slightly tricky step, but I've tried to describe it in detail — once you've done it once, it's easy.)
Cost: Free (regular paper works just as well as origami paper)
Materials:
- Paper (I recommend using origami paper when learning since the different colored sides make the instructions easier to follow, but really, any square paper will work.)
- Handout (optional…you could also just use this post)
Instructions:
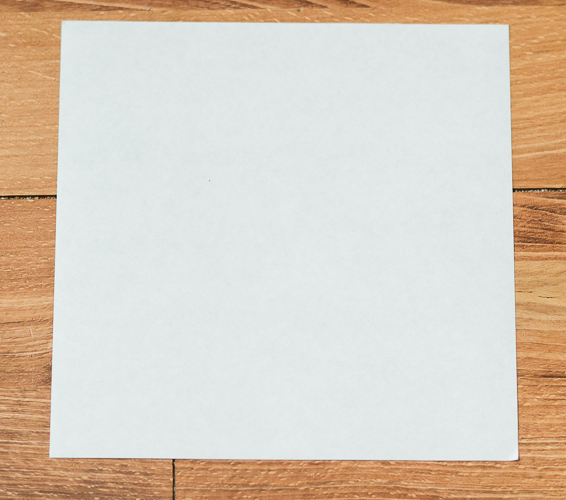
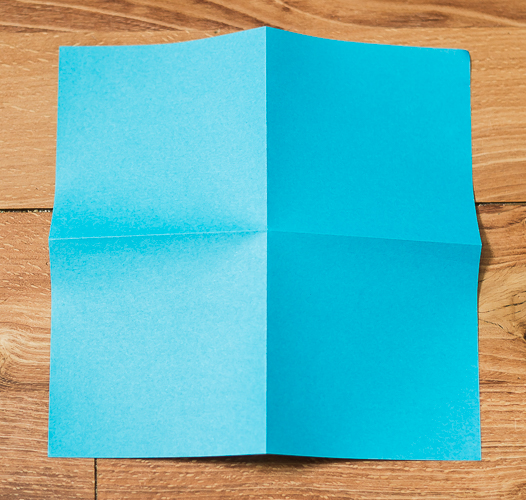
- Start with a square piece of paper. If you are using origami paper, start with the white side facing up.
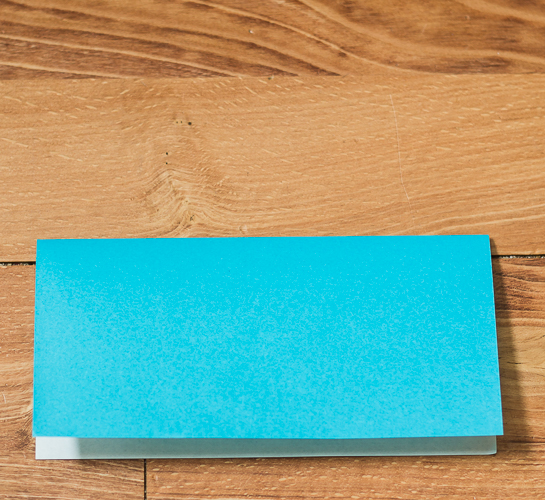
- Fold the paper in half by bringing the top edge down to the bottom edge.
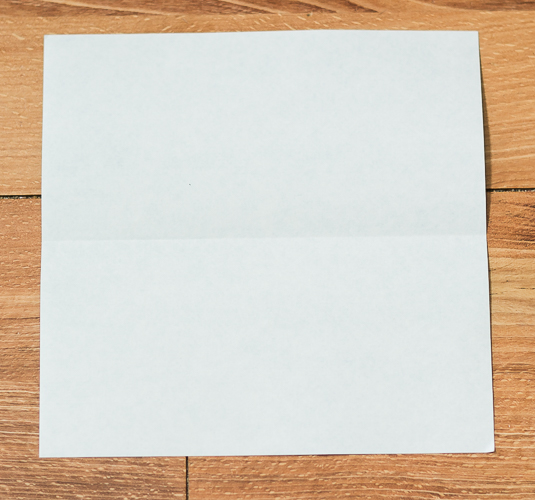
- Open the paper back up. Notice the horizontal crease in the middle.
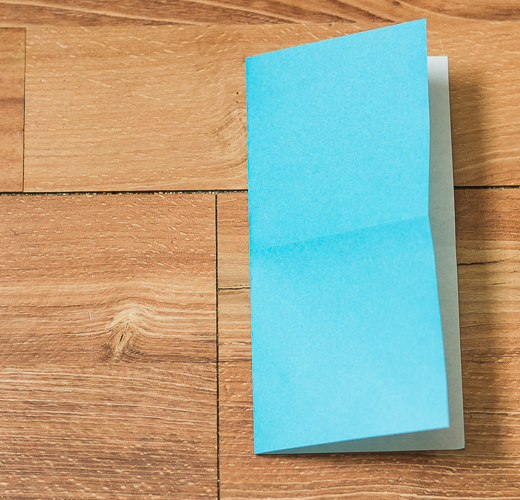
- Now fold the paper in half by bringing the left edge over to meet the right edge.
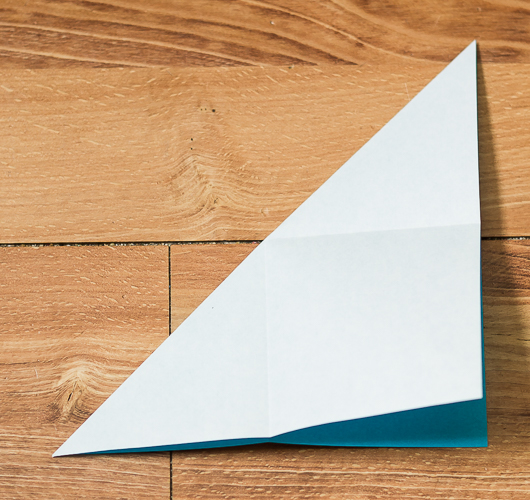
- Flip the paper over. If you are using origami paper, the colored side should now be up.
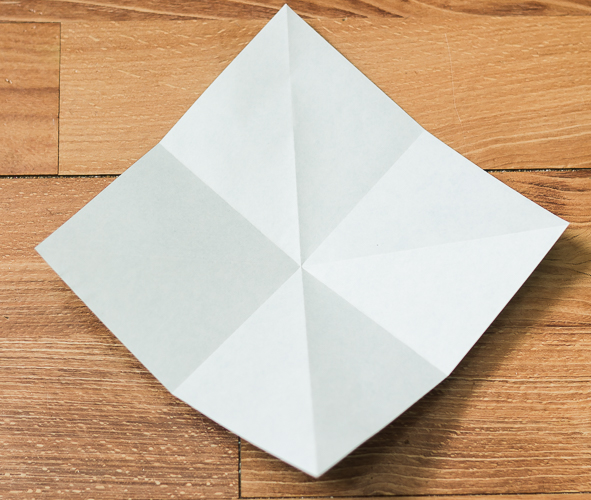
- Next you are going to fold the paper diagonally in both directions by first bringing the upper left and lower right corners together…
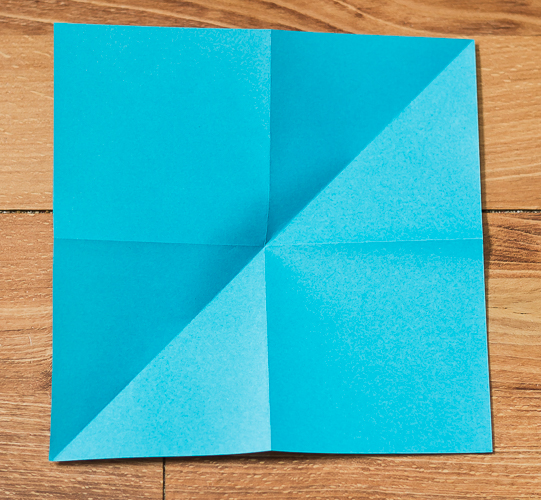
- …opening it back up…
- …then bringing the lower left and upper right corners together.
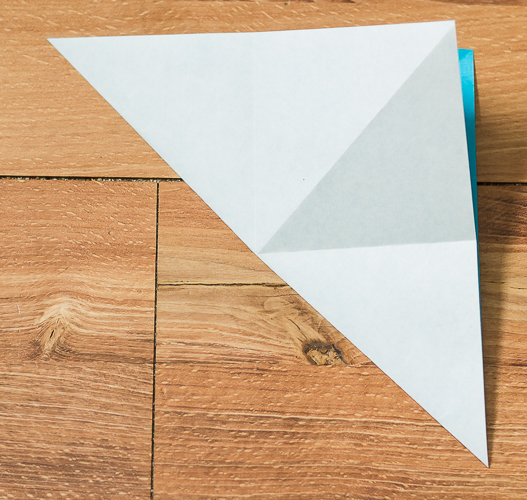
- Open the paper up and flip it over so the white side is showing again. Orient the paper so that a corner is at the bottom.
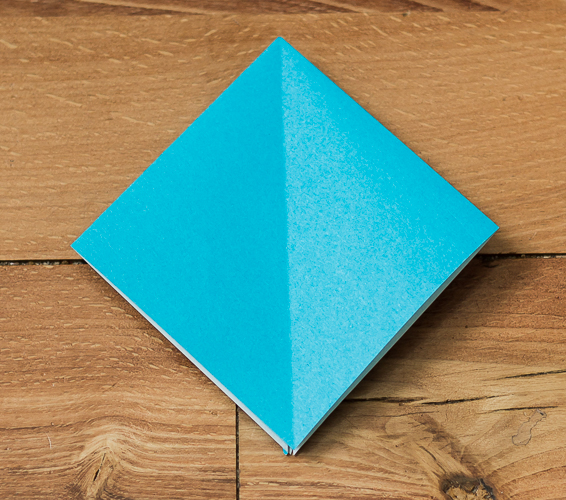
- Bring the left and right corners down to meet the bottom corner.
- Then bring the top corner down as well, so all 4 corners come together as shown. If you've folded the paper as described in the first steps, all the folds should already be bending the correct way.
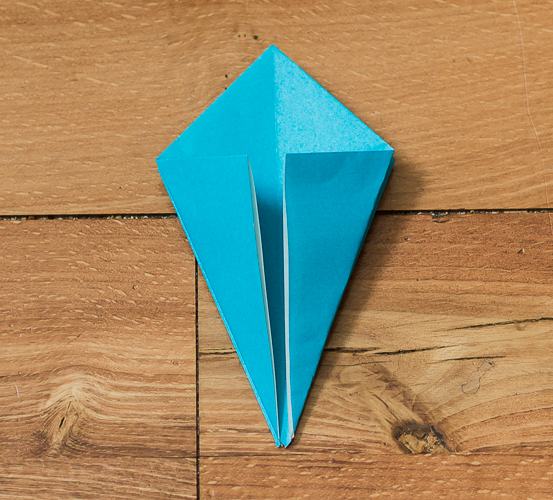
- Next bring the lower edges of the top to meet the vertical line in the center.
- Flip the paper over.
- Repeat Step 12 on this side too.
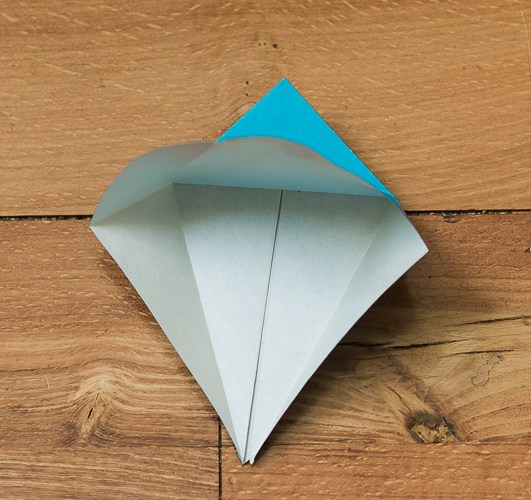
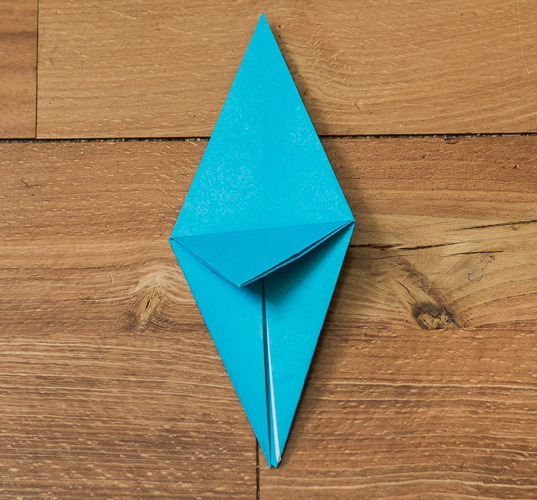
- Next, fold the top point down as shown, making a horizontal crease.
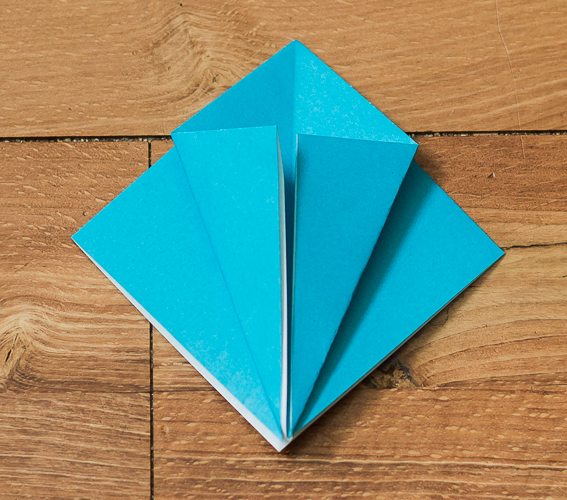
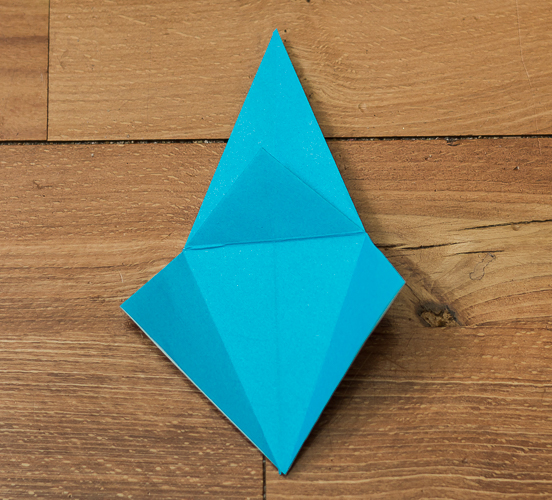
- Open up the three flaps on that side.
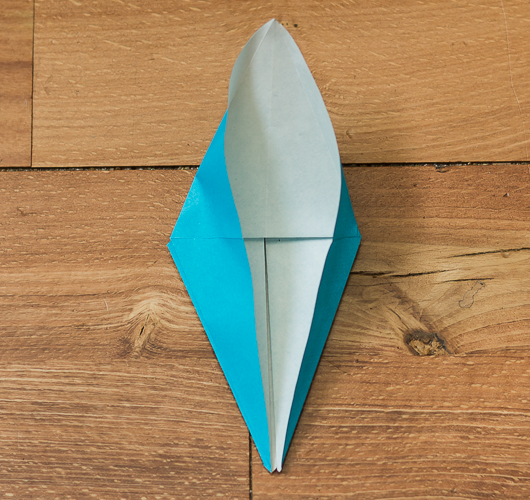
- This is the tricky part. You are going to start be lifting the top layer at the bottom point upward.
- Make sure that the paper stays creased at the fold you made in Step 15. Bring the left and right bottom edges in to meet the vertical line in the middle.
- Flatten the whole side as shown. You will need to reverse two of the folds in the upper portion. Tricky part done!
- Flip the paper over. You are going to repeat the last few steps on this side…
- Fold the point down as was done on the other side.
- Open up all three flaps.
- Repeat Steps 17 through 19 on this side.
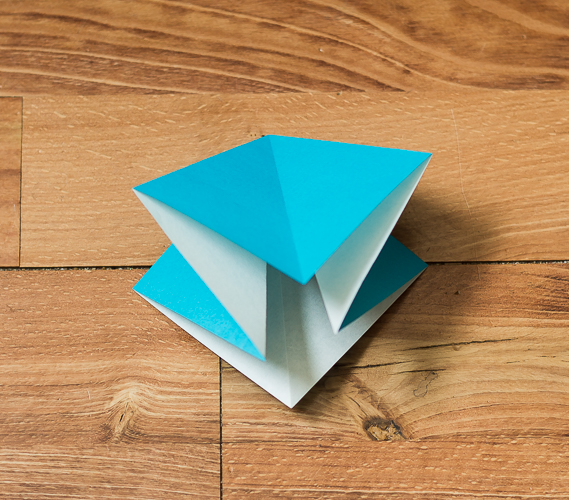
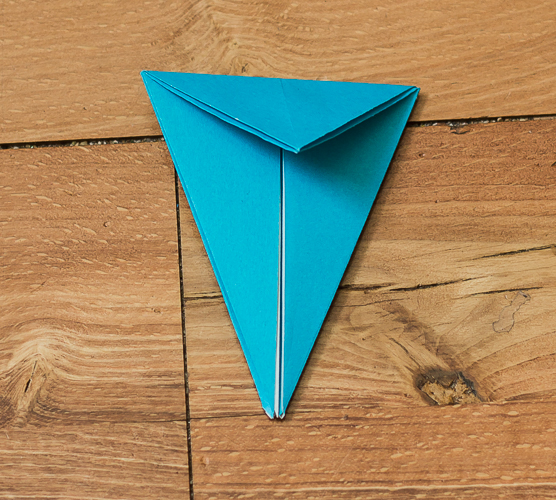
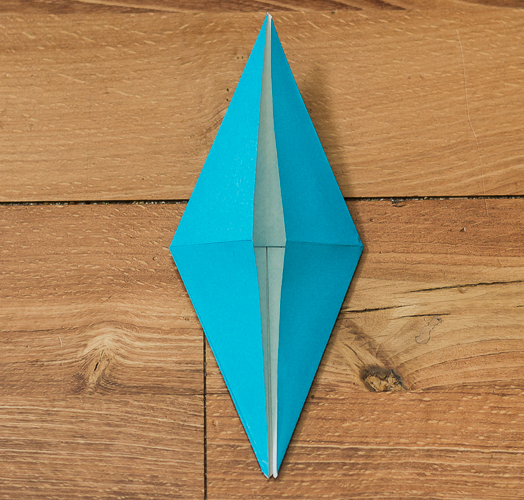
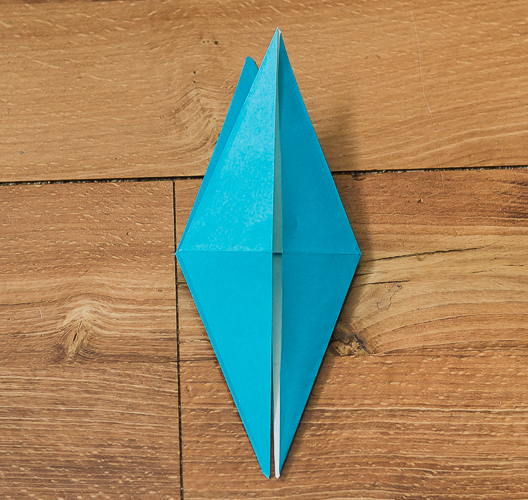
- Now you want to bring the left and right top layers together (shown) and the left and right back layers together (now shown). Sorry, it's a little hard to take a picture of this step.
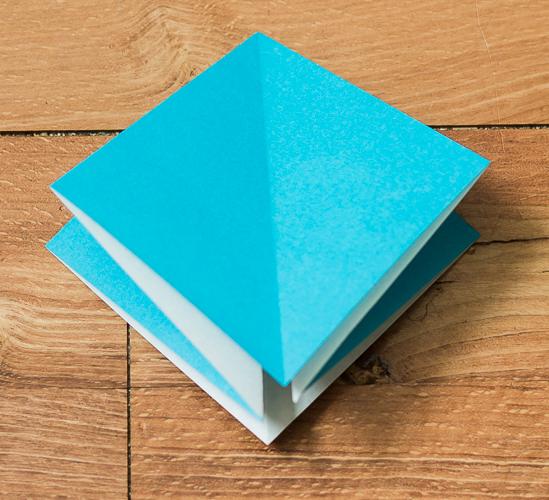
- When you lay it flat, it should look like this.
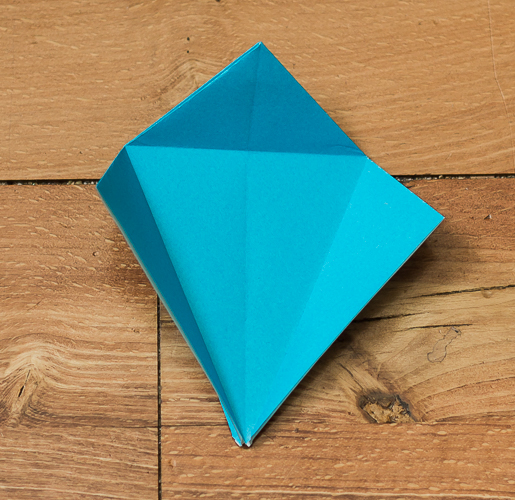
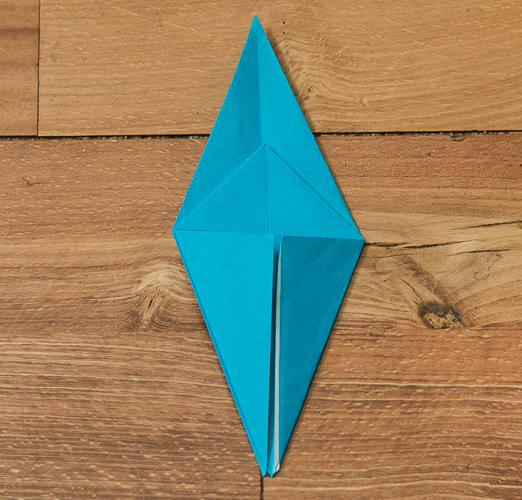
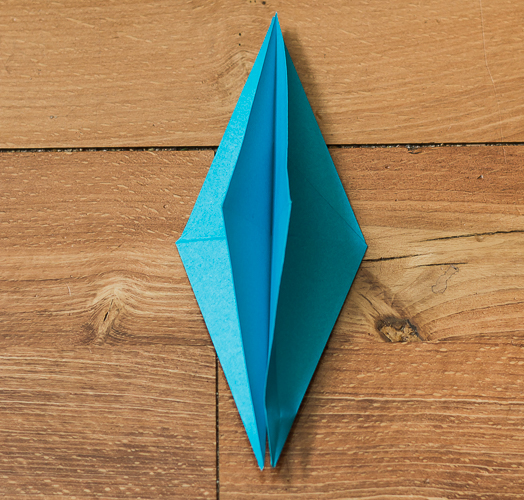
- Fold the top layer bottom point up to the top point.
- Flip the paper over.
- Fold the top layer bottom point up to the to point on this side too.
- Grab the two points sandwiched between the top and bottom layers and pull them out to the side as shown.
- Fold one of the ends over to make a head.
- Push the head fold to the inside as shown.
- Now you're done! Sometimes it makes it a little easier to flap the wings if you bend them a little bit beforehand, but this isn't really necessary.
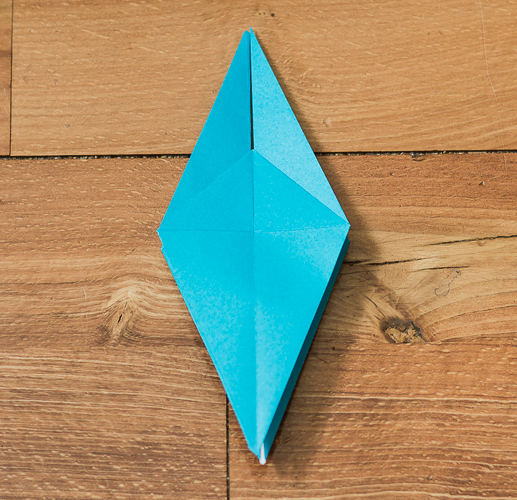
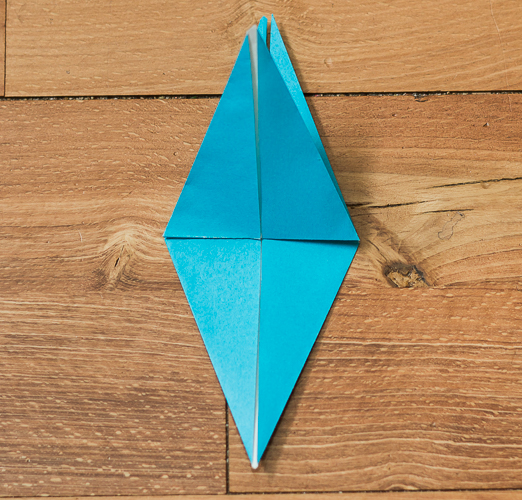
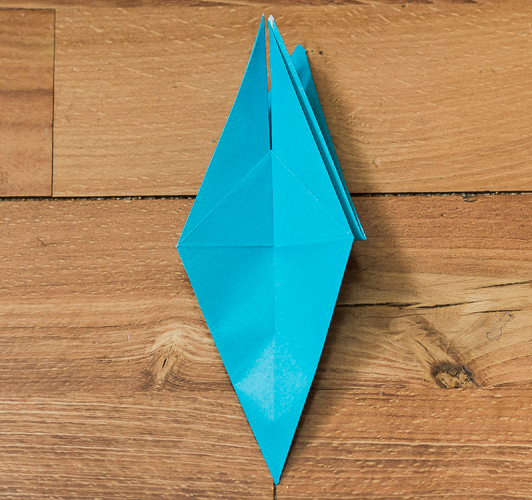
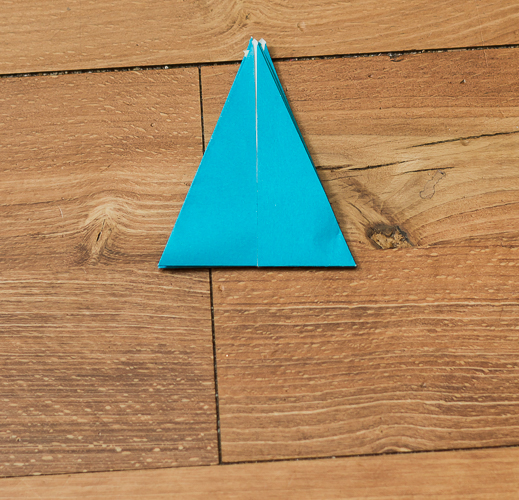
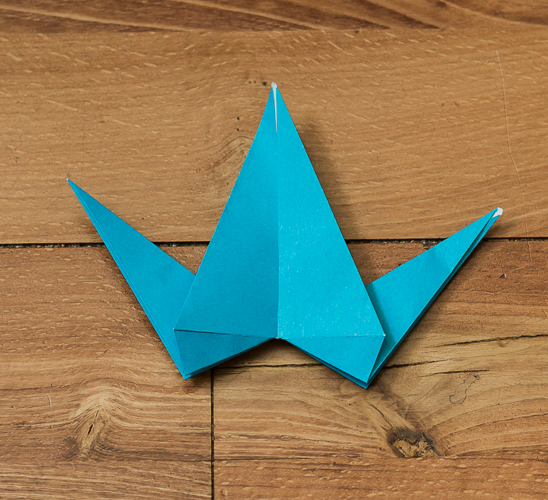
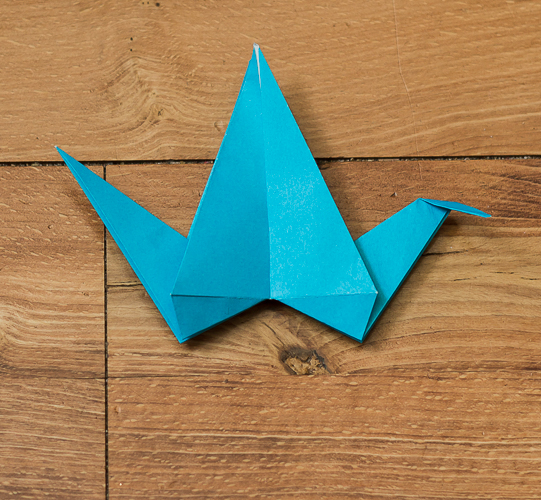
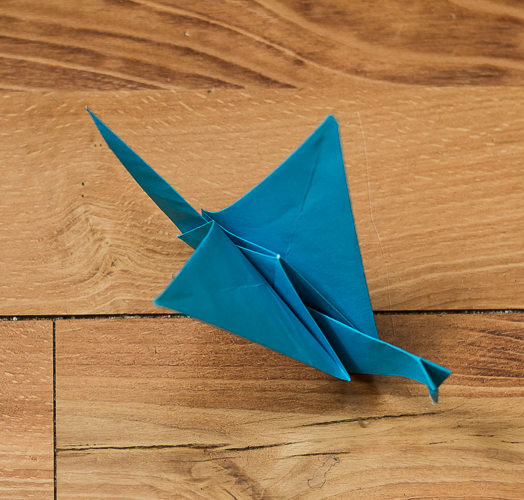
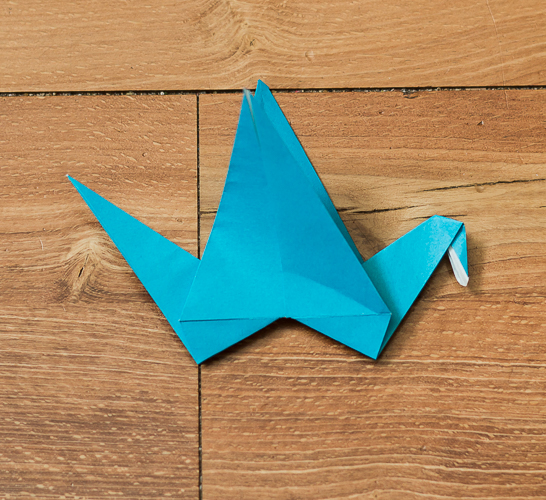
To flap the wings, you need to hold on to the back at the position shown and pull the neck forward.


Click here for more Homemade Fun ideas for kids.

Related Links
Homemade Fun for Elementary
Learning Ideas for Kids
Best Books for Kids
Reader Interactions
A Origami Bird Using a Hole Peace of Paper
Source: https://researchparent.com/origami-flapping-bird/
0 Response to "A Origami Bird Using a Hole Peace of Paper"
Post a Comment